156L
Skin / Accent Crash Course
20 June 2024
SITE
⠀⠀⠀about
⠀⠀⠀home
⠀⠀⠀gallery
⠀⠀⠀tutorial
COMMISSION RELATED
⠀⠀⠀prices
⠀⠀⠀tncs
⠀⠀⠀links/contact ↗
art + code + website : 156L ⊹ 2020 - 2024
this will be a multipart / segmented page, so i will be leaving a mini-directory to navigate through. I wrote the original on the FR Forums while on massive amounts of coffee when the website was down for the Auraboa breed addition, and I was really proud of that because I wrote it all in notepad. So here will it live as well. You can right click and open in new tab to see the image details more clearly, or hold press + open in new tab for mobile.
Guide Parts :
————————————————————————————————————————
‣ intro and programs to use
I realised skin coverage was a problem so I decided to make a guide for it. This was made in literally notepad during the downtime and i realised fancy headers wouldn't do for me so here we are. And then I got carried away and made a guide for the entire process, so welcome to the mess that is this guide. You can email me, message me on tumblr , inkblot PM, drive an F1 car right through my window if you'd like clarification on anything! The links at the top are for those who want to skip straight to the coverage part.
To start here are links to the two free programs so you can completely remove photoshop from your skinmaking life. it's not even good for drawing until 2017, where they added smoothing (better known as stabiliser), and yet the thing lags to kingdom come :
Medibang Paint | GNU Image Manipulation Program
you can draw with GIMP, but don't do that unless you want to suffer and you want 5 steps to making a circle. You can literally use anything else to draw. not GIMP. please.
————————————————————————————————————————
‣ skinmaking/drawing
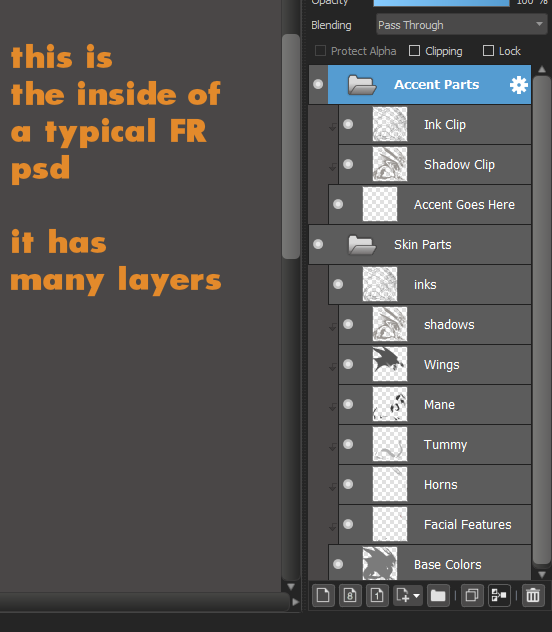
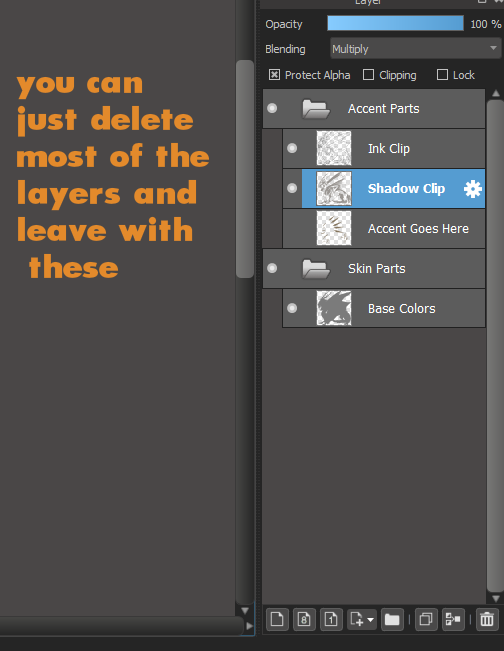
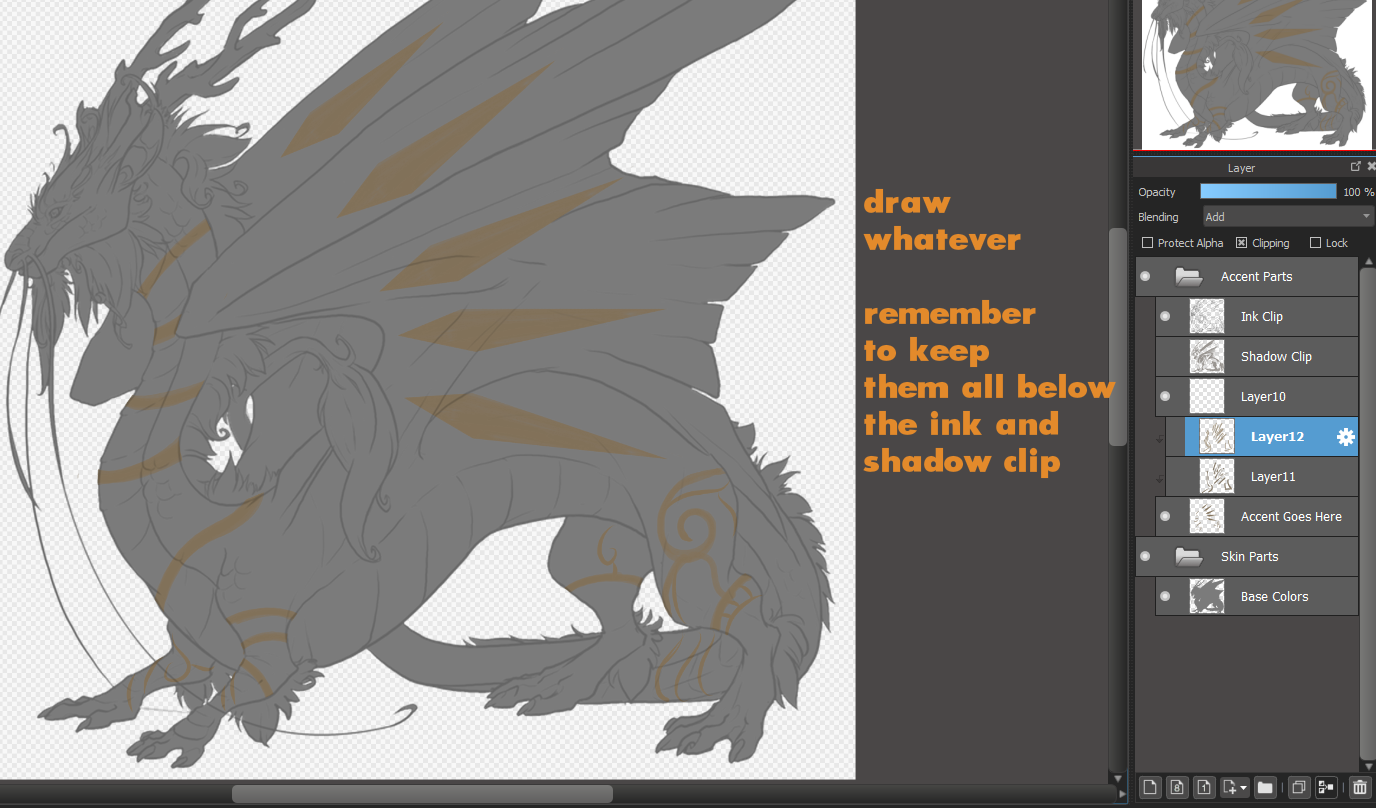
Obviously you are gonna have to download the PSD of the dragon you want to make a skin for. So go over to Custom Skins -> Download PSDS and extract the PSD from the zipfile. Then open up Medibang Paint Pro. Open the PSD in it and you will see many things happening. Let's clean that all up. delete all the separate shading layers in "Skin Parts" and leave them like the images below.
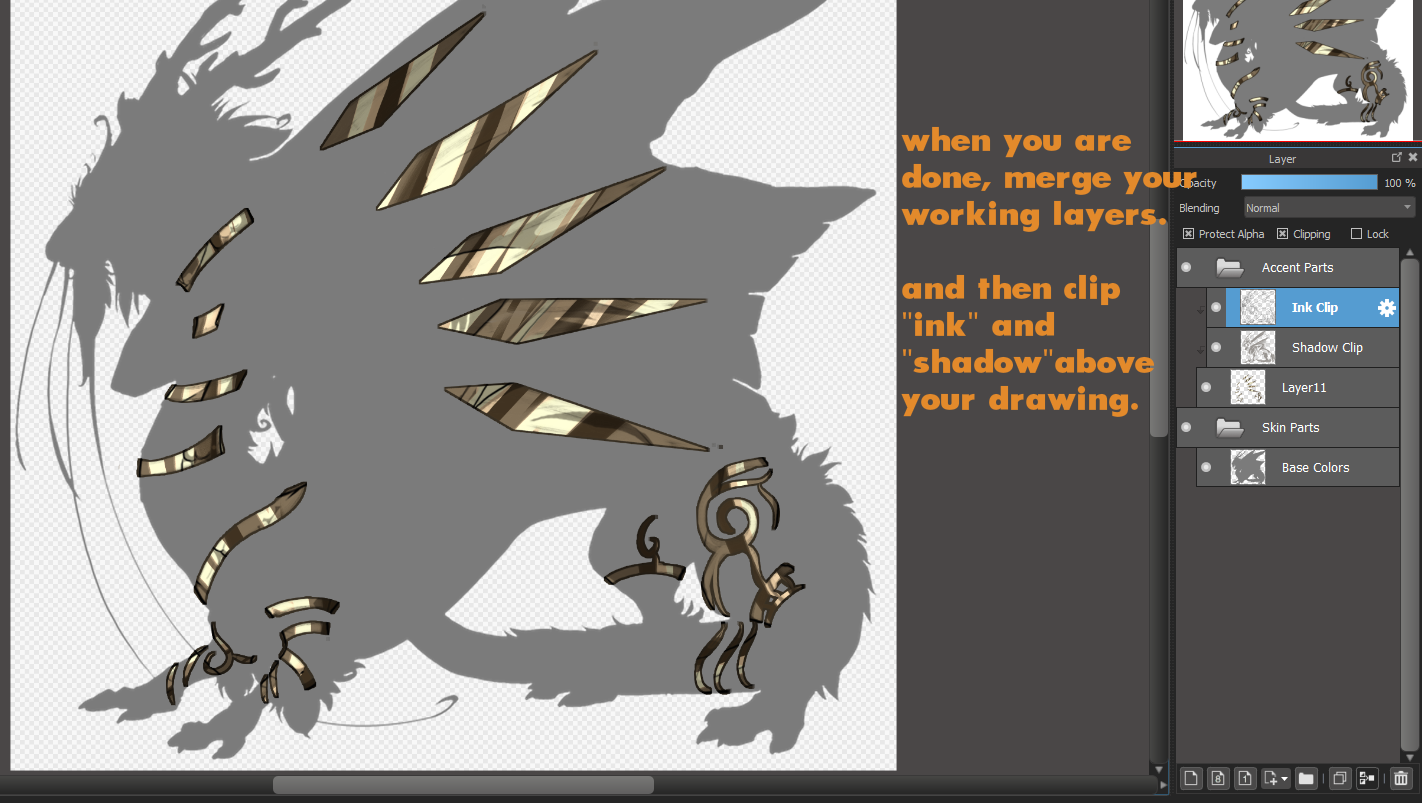
Next, draw whatever you want, following the normal process of sketching -> lineart -> colours. Just remember to keep all your effect layers and stuff under the Ink and Shadow Layers. When you are done, merge your working layers, and then clip the Ink and Shadow Layers onto the finished drawing. Fact : you can colour in the lines and tint the shadow for a more cohesive look, but the shadows and lines must always be darker than the artwork the last image is an example of okay shadow, but lines that will get you rejected on the spot
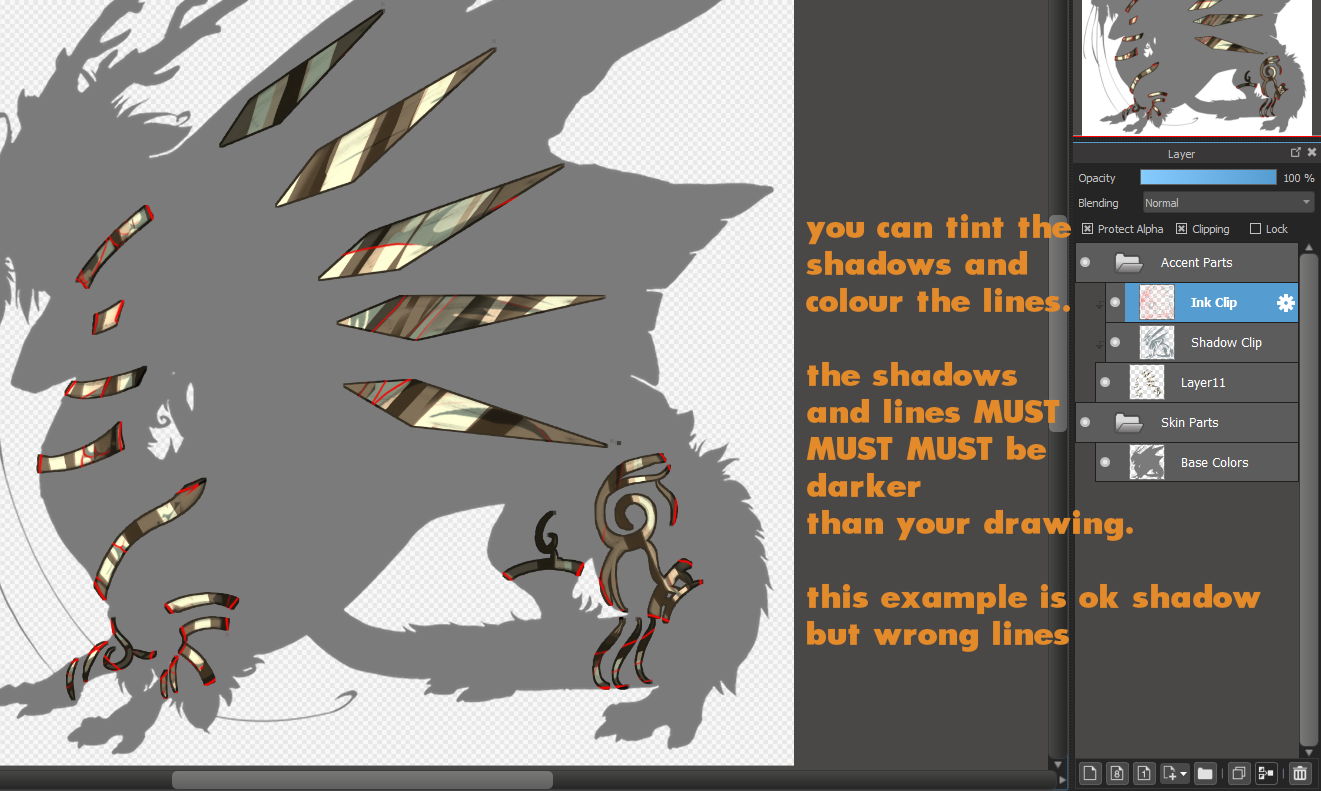
nice! you just made you very first skin artwork for your dragon!
————————————————————————————————————————
‣ exporting your image
Now that you have a nice image, you need to make it into FR's dragon size. Somehow, it is really easy to screw up. I have no idea how people screw up. There is a difference between Image Size and Canvas Size : The first one is to resize the entire image, while the latter makes drawing space less / deletes everything outside the specified drawing area. You must make it transparent, png, no white or black or grey backgrounds! You are going to put it on your dragon, how will anything get seen if you make it a white box??
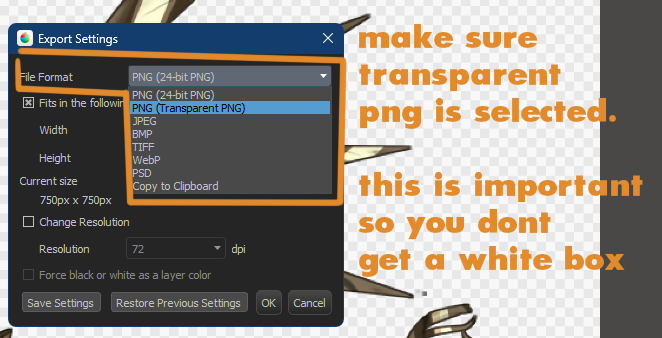
- Turn off the base colour for the dragon, or basically anything under your accent. click File -> Export... A popup will open.
- make sure in file format, Transparent PNG is selected. So you wont end up with a white box around your artwork.
- set the numbers in the box to 350px. and make sure that's it. nothing else.
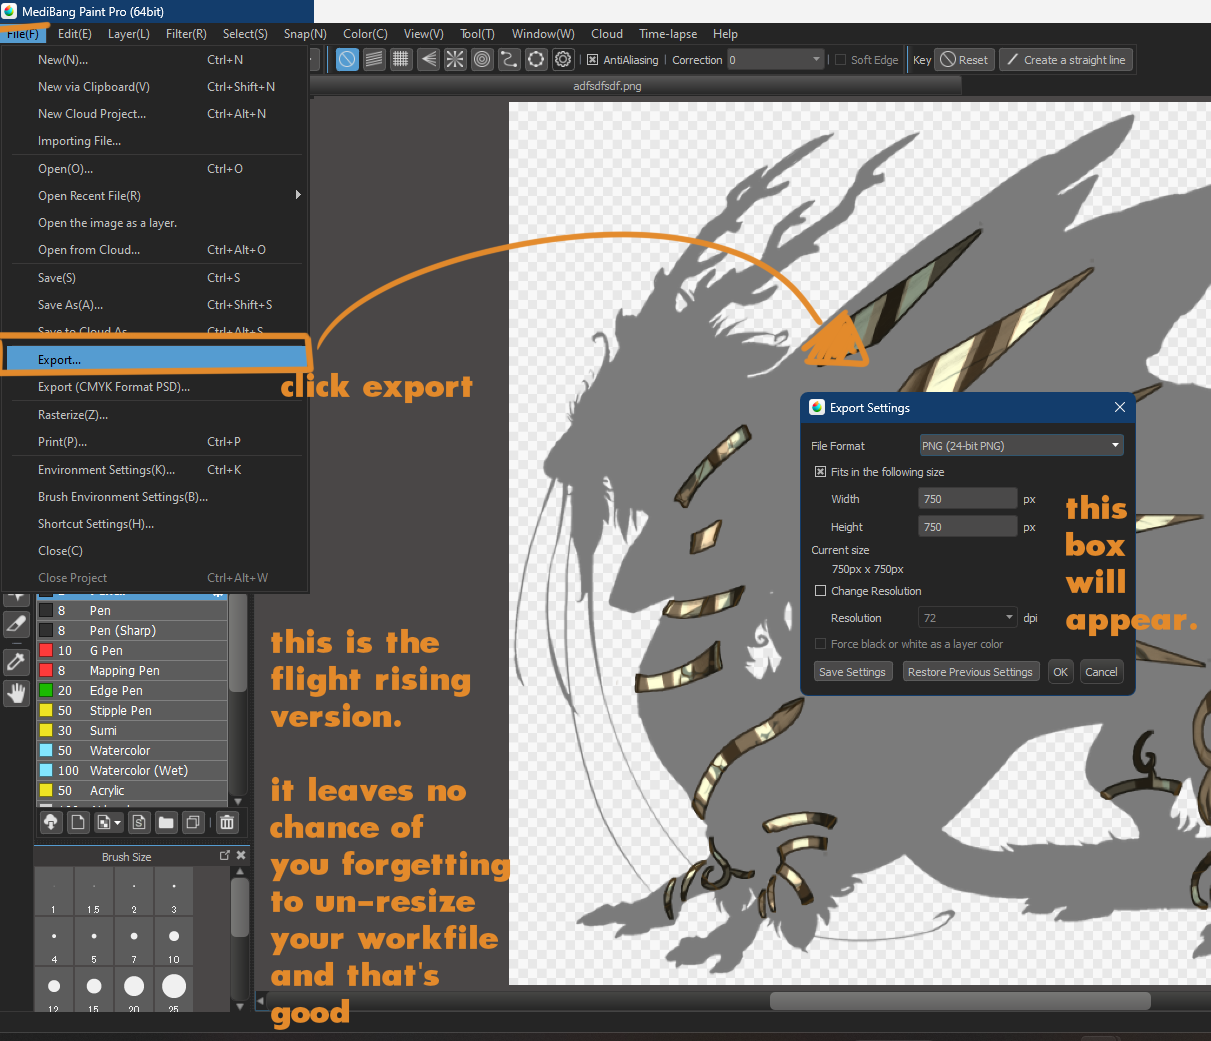
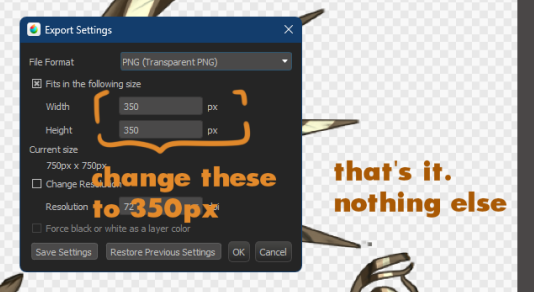
there you go! a clean, no funny box, transparent image.
————————————————————————————————————————
‣ accent or skin? or skincent?
As of 29 April 2024, all skin coverage things are finally handled onsite, including telling you if something is eligible for accent blueprints instead. Progress! You no longer have to second guess the whims of coverage, except if you accidentally bought a skin blueprint and don't want to waste it. Which keeps happening to me. If you want, you can go take the sample skin artwork here and test for yourself the skin coverage system. you can also doodle and submit it as your own, i really don't care.